Modern technology makes it easier for us to stay connected with friends and family... These days, It's much quicker and easier for us to pick up our IPhones and send a text or write an email instead of sending a card or a letter in the post.... I'm guilty of doing all of that myself! But how lovely is it to receive anything in your mail box that is not. a. bill!!!! I am guilty of not really sending much in the post these days, besides my Christmas card every year and birthday cards to family interstate.... Perhaps I should change that...
When David and I were first married, I ordered us a return address stamp for all our correspondence. It came in handy when we sent out our "Thank You" cards after our wedding, and for Christmas cards, and all sorts of things.
Since we sold our home and moved, we have celebrated many occasions and so we have sent all kinds of things in the post - Christmas cards, Birthday invitations, Birth announcements, Christening invitations and Thank yous... Lots and lots of envelopes that required our return address on the back... But we were living in a short term rental and so there was just no point in having a new stamp made.
It became frustrating having to hand write each one (though, I do realise that I could have printed labels or something else but I didn't!!!!) and so knowing that we will soon have a new permanent address, I have been on the look out for a new return address stamp.
Our original one was purchased at Officeworks, and then sent away to be personalised, but I don't believe that they are available any longer - at least I couldn't find any when I looked there a while back. So, anyway, I thought I would have a look on Etsy! Well, I was SO excited to find so many pretty options! And they are all much, much nicer than the one we originally had!
Here are some that have caught my eye.....

Image and stamp from My Stamp
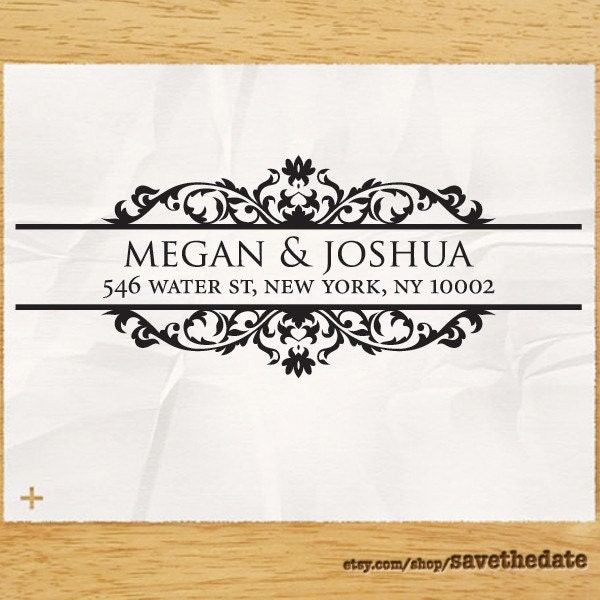
Image and stamp from savethedate

Image and stamp from NoteTrunk

Image and stamp from savethedate

Image and stamp from savethedate

Image and stamp from BearRubberStamps
Now just to make a decision on which one to order! Tough one!
Curious to know... How do you mark your envelopes with your return address? Do you have a return address stamp?
Teresa